Why Your Desk Posture Keeps Slipping (and Why a Single Yoga Session Won't Fix It)
If you've ever finished a 10-minute desk yoga video feeling great, only to slump back into your chair within an hour, you're not alone. I've been there too. The problem isn't that the poses don't work -- it's that we treat posture like a one-time fix instead of a continuous habit.
Most people don't realize that the real culprit behind desk-related posture issues isn't weak muscles or tight hips alone. It's positional awareness -- or the lack of it. You can stretch perfectly for five minutes, but if you spend the next 55 minutes with your head poking forward and shoulders rounded, the pattern stays rooted.
This article is different. Instead of giving you another list of poses to do once a day, I'll show you how to weave micro-yoga movements into your workflow -- 30-second corrections you can repeat every hour. Combined with smart desk ergonomics, this approach builds muscle memory that actually lasts.
For a broader foundation on standing and sitting alignment, check out our guide to Simple Tips for Better Everyday Posture. But here, we're going deep into the desk-specific micro-habits.
What 'Good Posture' Actually Means for a Desk Worker
Before we dive into the yoga moves, let's get precise about what we're aiming for. Posture isn't about being rigidly straight. It's about neutral alignment where your spine's natural curves are supported without excessive tension.
From a side view, a healthy desk posture looks like this:
- Ears aligned over your shoulders (not in front of them)
- Shoulders relaxed, not hunched or pulled back unnaturally
- Elbows at 90 degrees, wrists straight
- Hips slightly higher than knees (or neutral)
- Feet flat on the floor or a footrest
When I first started working from home, I had my monitor too low and my chair too high. I thought I could stretch my way out of the neck pain. But no amount of neck rolls fixed the fact that I was looking down 45 degrees for eight hours a day. Ergonomics must come first, then yoga enhances it.
Why Yoga Works for Posture (The Evidence Your Body Already Knows)
Yoga improves posture through three specific mechanisms. Understanding them helps you choose the right micro-moves:
1. Lengthening Tight Hip Flexors
Sitting shortens the psoas and iliacus muscles. When they tighten, they pull the pelvis into an anterior tilt, which exaggerates the lower back curve and leads to a swayback posture. Yoga poses like low lunge and pigeon directly target these muscles. A 2017 study in the Journal of Physical Therapy Science found that six weeks of hip flexor stretching significantly reduced lumbar lordosis in sedentary office workers.
2. Strengthening the Posterior Chain
Your back muscles -- especially the rhomboids, mid-traps, and spinal erectors -- are often weak from constant sitting. Yoga poses like locust (salabhasana) and cobra activate these muscles. The key is to hold them with engagement, not just passive stretching.
3. Improving Proprioception
Proprioception is your body's ability to sense its position in space. Desk workers often lose this awareness in their upper back and neck. Simple yoga movements like shoulder blade squeezes and chin tucks retrain the brain to feel where neutral is. As we covered in How to Improve Posture with Simple Moves, these small neural recalibrations are more powerful than any single stretch.
The Micro-Yoga System: Your 30-Second Desk Reset
Here's the framework I've used with clients (and myself) for years. Every hour, set a timer. When it goes off, do one of the following four micro-routines. They take less than a minute and can be done right in your chair or standing beside it.
Rotate through them throughout the day. Don't repeat the same one every hour -- variety keeps the muscles from adapting.
Routine 1: Chin Tuck + Shoulder Blade Squeeze (30 seconds)
This is the single most effective move for forward head posture. Here's how to do it right:
- Sit up tall, feet flat. Place your fingers on your chin.
- Gently push your chin straight back, as if making a double chin. Keep your gaze level -- don't look down.
- Hold for 5 seconds, then release. Repeat 5 times.
- Immediately follow with shoulder blade squeeze: roll your shoulders back and down, then squeeze your shoulder blades together as if holding a pencil between them. Hold 5 seconds, release. Repeat 5 times.
Common mistake: Tilting your head down instead of moving it straight back. The movement should be horizontal, not vertical. If you feel a pinch at the base of your skull, you're doing it right -- that's the suboccipital muscles releasing.
Routine 2: Seated Cat-Cow on the Breath (30 seconds)
Most desk workers have a stiff mid-back (thoracic spine). Seated cat-cow brings mobility without leaving your chair.
- Sit forward on your chair, hands on your knees.
- Inhale: arch your spine, open your chest, look slightly up (cow pose).
- Exhale: round your spine, tuck your chin, pull your navel in (cat pose).
- Move slowly, coordinating breath with movement. Do 5 rounds.
Trade-off: If you have lower back issues, avoid over-arching in cow pose. Keep the movement in your upper back only.
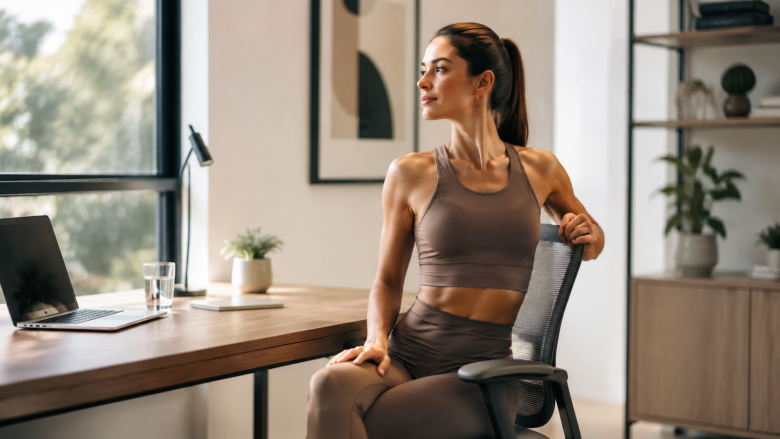
Routine 3: Seated Pigeon for Tight Hips (30 seconds per side)
Your hips are constantly flexed while sitting. This micro-move releases the external rotators.
- Sit on the edge of your chair. Cross your right ankle over your left knee, keeping your right foot flexed.
- Keep your spine tall and hinge forward from the hips (not the waist) until you feel a stretch in the right glute/hip.
- Hold for 15 seconds, breathing deeply. Switch sides.
Mistake to avoid: Letting your lower back round. If you can't keep your spine straight while hinging, place a hand on your desk for support.
Routine 4: Wrist and Finger Stretch (30 seconds)
Typing all day shortens the wrist flexors and can contribute to shoulder tension. This is often overlooked in desk yoga routines.
- Extend your right arm in front, palm up.
- Use your left hand to gently pull your fingers back toward the floor. Hold 15 seconds.
- Then, turn your palm down and push your fingers down toward the floor. Hold 15 seconds.
- Shake out your hands. Repeat on the left.
Why it matters: Tight wrists can pull on the elbow and shoulder, creating a chain of tension that affects your neck. Releasing the hands helps the whole arm relax.
Ergonomics First, Yoga Second: How to Set Up Your Desk for Success
No amount of yoga will fix a desk that's forcing you into bad posture. Here's a quick checklist to align your workspace before you start stretching:
- Monitor height: The top of your screen should be at or slightly below eye level. If you have to tilt your head up or down, adjust it.
- Chair depth: You should have 2-3 inches between the back of your knees and the chair seat. If the seat is too deep, use a lumbar cushion.
- Keyboard position: Your elbows should be at 90 degrees, wrists straight. If your keyboard is too high, you'll round your shoulders.
- Foot support: If your feet don't rest flat on the floor, use a footrest. Dangling feet pull your pelvis into a tilt.
I once worked with a graphic designer who had chronic shoulder pain. She did pigeon pose every day, but it didn't help until we realized her desk was 4 inches too high. She was constantly shrugging her shoulders. After lowering the desk, the yoga started working. Ergonomics is the foundation.
Building a Habit That Sticks (The 3-Part System)
Knowing the moves is one thing. Doing them consistently is another. Here's the system that actually works for my clients:
Part 1: The Hourly Trigger
Use a physical cue, not a phone alarm. Put a sticky note on your monitor that says "NECK?" or set a repeating computer reminder. I use a browser extension that pops up every 60 minutes with a simple image of a chin tuck. The key is to make the trigger unavoidable.
Part 2: The Minimalist Approach
Don't tell yourself you'll do a 10-minute routine. That's too much friction. Commit to just 30 seconds. If you feel like doing more, great. But the minimum is the foundation. As I learned early in my practice, showing up for 30 seconds five times a day is far more effective than a 15-minute session you skip because you're busy.
Part 3: The Accountability Loop
Keep a small tally on a whiteboard or in a note. Every time you complete a micro-session, mark it. At the end of the day, you'll see your progress. This visual feedback reinforces the habit.
For a deeper dive on habit stacking, see our guide on How to Form Better Sleep Habits Step by Step -- the same principles apply to movement habits.
Advanced Awareness: The Thing Nobody Tells You About Posture
Here's the insight that changed everything for me: Good posture isn't a position you hold; it's a position you return to. Your body will naturally drift into slouching throughout the day. That's not a failure -- it's biology. The goal is to notice the drift and correct it, not to stay perfectly still like a statue.
I used to beat myself up for slumping. Now I treat each correction as a rep. Every time I do a chin tuck or shoulder squeeze, I'm strengthening the neural pathway that reminds me where neutral is. Over weeks, the number of corrections you need will decrease, because your body starts to default to better alignment.
But there's a catch: if you try to force your shoulders back and chest out all day, you'll end up with overworked rhomboids and a stiff neck. That's another common mistake. True postural alignment comes from a balanced activation of the front and back of the body, not from pulling one part into place.
Common Mistakes Even Experienced Yoga Practitioners Make at Their Desk
Let me save you some pain. Here are the errors I've made and seen others make:
- Holding the breath. In seated twists especially, people instinctively hold their breath. Breathe normally. If you hold, you create tension that defeats the purpose.
- Rounding the lower back in forward folds. When you hinge forward for a seated hamstring stretch, keep your spine long. If you round, you're stretching your spinal ligaments, not your hamstrings.
- Over-stretching the neck. Never force your neck to the side with your hand. Use gentle gravity. If you feel a sharp pain, stop.
- Ignoring the non-dominant side. Most people stretch their right hip more because they're right-handed. Make sure you give equal time to both sides.
- Expecting instant results. Posture changes take weeks of consistent micro-movements. If you go into this expecting to feel different in two days, you'll quit too soon.
When to Do More: Extending Your Micro-Yoga into a Full Session
Sometimes 30 seconds isn't enough. If you feel a specific tightness that won't release, or if you've been sitting for three hours straight, take a 5-minute break. Here's a quick sequence that complements the micro-moves:
- Standing forward fold (uttanasana) -- 30 seconds
- Low lunge with hands on desk -- 30 seconds per side
- Standing side stretch -- 15 seconds per side
- Cat-cow on all fours on the floor -- 1 minute
- Child's pose -- 1 minute
This sequence is especially helpful after a long meeting or a coding session. It resets your nervous system as well as your muscles.
If you want a dedicated space for these sessions, our article on How to Set Up a Budget Home Yoga Spot offers tips for creating a small floor area near your desk.
The Micro-Yoga Decision Matrix: Choosing the Right Move for Your Pain
Not all micro-moves are equally effective for every symptom. Use this quick reference:
| If you feel... | Do this micro-move | Why it works |
|---|---|---|
| Neck stiffness at the base of skull | Chin tucks | Releases suboccipitals, realigns cervical spine |
| Shoulder tightness between shoulder blades | Shoulder blade squeezes | Activates rhomboids, opens chest |
| Low back ache | Seated cat-cow | Mobilizes thoracic spine, reduces lumbar load |
| Hip pain | Seated pigeon | Stretches external rotators, reduces pelvic tilt |
| Wrist or finger discomfort | Wrist flexor/extensor stretch | Reduces tension in forearm, prevents carpal tunnel |
| General fatigue | Deep breathing with shoulder rolls | Increases oxygen, relaxes upper traps |
Putting It All Together: A Sample Micro-Yoga Day
Here's what a realistic day might look like for a tech worker:
- 9:00 AM -- Start work. Quick ergonomics check (monitor height, chair depth).
- 10:00 AM -- Chin tuck + shoulder blade squeeze (30 sec)
- 11:00 AM -- Seated cat-cow on the breath (30 sec)
- 12:00 PM -- Lunch break. Walk for 5 minutes.
- 1:00 PM -- Seated pigeon (30 sec each side)
- 2:00 PM -- Wrist and finger stretch (30 sec)
- 3:00 PM -- Chin tuck + shoulder blade squeeze again (30 sec)
- 4:00 PM -- Seated cat-cow (30 sec)
- 5:00 PM -- End of day. Optional 5-minute floor sequence.
That's only 3 minutes of yoga total, spread across the day. But it's enough to keep your body from locking into one position. Over a week, that's 15 minutes of targeted, high-frequency movement that directly counters the effects of sitting.
The Honest Limitations: What Yoga for Desk Posture Can't Do
I want to be straightforward. Yoga is powerful, but it's not a cure-all. If you have chronic pain that doesn't respond to these micro-moves within a few weeks, see a physical therapist or a doctor. Some postural issues involve structural factors (like leg length discrepancy or scoliosis) that require professional assessment.
Also, yoga alone won't offset the metabolic effects of sitting all day. You still need to stand up, walk, and move your body in varied ways. The micro-yoga system is a supplement, not a replacement for overall physical activity.
Finally, be patient with yourself. The first week you try this, you'll probably forget most of your hourly triggers. That's normal. Keep the sticky note on your monitor. It took me about three weeks before the habit became automatic. Now, I don't even need the timer -- my body starts to feel the need for a chin tuck around the 50-minute mark. That's the muscle memory I'm talking about.
Your Next Step: Start with One Hour
Don't try to implement all four routines tomorrow. Pick one -- the chin tuck + shoulder blade squeeze is the best starting point. Set a timer for one hour from now. When it goes off, do it. That's it. Do that for a week. Then add another routine.
Building better posture is a marathon, not a sprint. But with micro-yoga, you're not running the marathon all at once. You're taking a single step, every hour. And that's how you cross the finish line.