Why Most Hamstring Stretches Are Making You Tighter
If you have been forcing your way into a toe touch with a rounded lower back, you are likely stretching your sciatic nerve, not your hamstrings. I learned this the hard way ten years ago when I spent six weeks doing seated forward folds every morning, only to wake up with a burning sensation down my left leg. The problem was not tight hamstrings -- it was neural tension masquerading as muscle tightness.
What I want to share with you is a radically different approach: a safety-first hamstring release protocol that prioritizes nerve protection, proper breathing mechanics, and a clear progression from release to lengthening to strengthening. This is not another list of stretches. This is the evidence-based alternative to the cookie-cutter routines you find on YouTube and health sites.
Most people searching for "how to stretch tight hamstrings safely" are actually asking three deeper questions: "Is this stretch hurting me?" "Why are my hamstrings so tight in the first place?" and "How long before I see real change?" We will answer all three, with specific stop signals and red flags that most guides ignore.
What Not to Do With Tight Hamstrings
Before we talk about what works, let us be clear about what does not. The single most common mistake I see -- and one I made myself -- is ballistic bending: bouncing at the end range of a forward fold, trying to go deeper with momentum. That is a fast track to a hamstring strain or, worse, a disc herniation.
Here are the specific movements to avoid when your hamstrings are tight:
- Toe touches with a rounded spine -- This places the entire stretch on the spinal ligaments and sciatic nerve, not the hamstrings. If you can touch your toes only by curling your lower back, stop immediately.
- Straight-leg sit-and-reach tests -- These are diagnostic tools, not warm-ups. Doing them as a stretch is like using a hammer to check if a nail is loose.
- Holding a stretch past the point of shaking -- Muscle trembling is a sign of neuromuscular fatigue or overstretch. Pushing through it is asking for injury.
- Any stretch that causes sharp pain, numbness, or tingling -- That is nerve pain, not muscle stretch. Back off completely.
The thing nobody tells you about tight hamstrings is that they are often a protective response. Your brain might be tightening them to stabilize a weak core, a stiff hip, or a lumbar disc that is under load. When you yank on the hamstrings, you can override that protective spasm and cause real damage. As we covered in our guide on how to build easy morning stretch habits, the key is to start with movements that feel safe, not aggressive.
Is It Muscle Tightness or Nerve Tension? How to Tell the Difference
This is the most important distinction you will make. Muscular tightness feels like a dull, pulling sensation in the belly of the hamstring muscle (the back of your thigh). Nerve tension feels like a sharp, electric, or burning sensation that often radiates down the back of the leg, sometimes into the calf or foot.
To test which one you have, try this: sit on the edge of a chair with your right leg straight out, heel on the floor, toes pointing up. Gently lean forward from your hips. If you feel a pulling in the back of your thigh, that is hamstring. If you feel a shooting sensation down the leg or into the foot, that is nerve -- likely the sciatic nerve or its branches.
If you experience nerve symptoms, traditional hamstring stretches can make things worse. This is a contraindication that most stretching guides ignore. In that case, you need to address the nerve glide before any lengthening. A simple nerve glide: sit tall, extend one leg, and gently flex and point your ankle while keeping the knee straight. Do not force the range. Just move the foot in and out of flexion. This helps desensitize the nerve.
For a deeper dive on safe daily sequences that respect nerve tissue, see our article about how to follow a short daily stretch sequence.
The Root Cause of Tight Hamstrings (and Why Stretching Alone Won't Fix It)
What is the root cause of tight hamstrings? The answer is rarely "they are too short." In my experience working with clients, the most common underlying causes are:
- Prolonged sitting -- When you sit for hours, your hip flexors shorten and your hamstrings are placed in a shortened position. Over time, the brain adapts by keeping them contracted even when you stand.
- Weak glutes and core -- Your glutes are the primary hip extensors. If they are weak, your hamstrings take over, leading to chronic overuse tightness.
- Lumbar spine instability -- If your lower back is unstable, the hamstrings tighten to provide a splinting effect. Stretching them without addressing the instability can worsen the problem.
- Nerve tension -- As mentioned above, impingement or irritation of the sciatic nerve can cause a sensation of tightness that is actually protective.
Most people don't realize that stretching a muscle that is already overworked and under-rested is like trying to stretch a rubber band that is already frayed. You need to release the overactive muscle, then lengthen it, and finally strengthen it to prevent recurrence. That is the three-step protocol we will use.
The Fastest Way to Loosen Tight Hamstrings (Without Stretching)
What is the fastest way to loosen tight hamstrings? The answer might surprise you: stop stretching them for a few days and instead use soft tissue release techniques. The fastest temporary relief comes from two methods:
1. Foam rolling the hamstrings -- Lie on your back, place a foam roller under your right hamstring, and slowly roll from the knee to the sit-bone. Spend 30-60 seconds on any tender spots. Do not roll over the back of the knee joint. This reduces muscle tone and increases blood flow.
2. Active release with a lacrosse ball -- Sit on a chair, place a lacrosse ball under your right hamstring near the sit-bone. Bend and straighten your knee slowly for 10-15 reps. This is called a pin-and-stretch technique and it targets trigger points more effectively than static rolling.
These methods work within minutes because they address the neuromuscular overactivity. However, the effect is temporary -- lasting 30-60 minutes. To make it last, you need to move to step two: lengthening with proper mechanics.
The 3-Step Safety-First Hamstring Release Protocol
This is the framework I use with my clients and myself. It is designed to be done in order, with specific stop signals at each stage. Do not skip ahead.
Step 1: Release (Gentle Soft Tissue Work)
Before any lengthening, we need to calm the nervous system and reduce muscle tone. Spend 5 minutes on the following:
- Foam roll each hamstring for 60 seconds, focusing on the mid-belly and the area near the sit-bone.
- Perform a nerve glide if you suspect nerve involvement (see above).
- Apply a warm compress or take a warm shower to increase blood flow.
Stop signal: If you feel sharp pain, bruising, or increased numbness, stop immediately. You may have a strain or nerve irritation that needs medical evaluation.
Step 2: Lengthen (Controlled, Pain-Free Stretching)
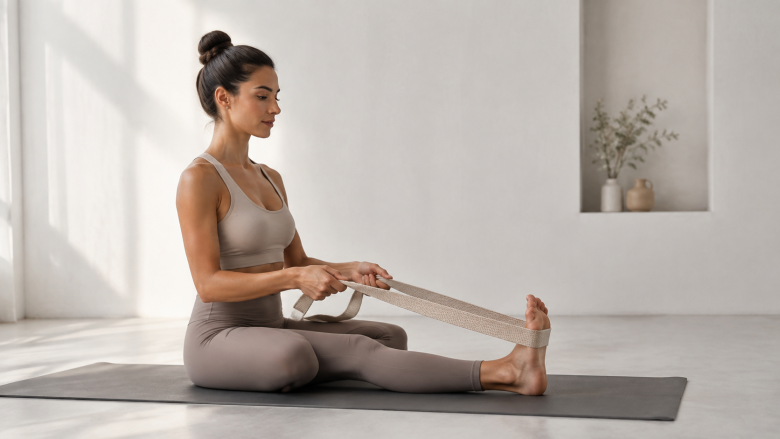
Once the muscle is released, you can safely lengthen it. The key is to keep the spine neutral -- never round your lower back. The safest stretch for most people is the supine hamstring stretch with a strap.
Lie on your back with both knees bent. Loop a strap (or towel) around the arch of your right foot. Straighten your right leg toward the ceiling, keeping the knee soft (not locked). Gently pull the leg toward you until you feel a mild pulling sensation in the back of the thigh -- not the calf or foot. Hold for 30 seconds, breathing deeply. Repeat 2-3 times per leg.
Breathing mechanics: Inhale to prepare, exhale as you gently increase the stretch. Never hold your breath. Breathing activates the parasympathetic nervous system, which helps the muscle relax. This is a critical detail that most guides miss.
Stop signal: If you feel a sharp, electric, or burning sensation, or if the leg starts shaking uncontrollably, release the stretch. You are either overstretching or irritating the nerve.
Step 3: Strengthen (Prevent Recurrence)
This is the step that 90% of hamstring stretching routines skip. Weak hamstrings are tight hamstrings. You need to strengthen them in a lengthened position to teach the brain that it is safe to release the tension.
Perform the Nordic curl progression (eccentric): kneel on a soft surface, anchor your feet under a heavy piece of furniture or have a partner hold them. Slowly lower your torso toward the floor, keeping your back straight. Use your hands to catch yourself when you cannot control the descent. Push back up with your hands. Aim for 3-5 reps, 2-3 times per week.
Stop signal: If you feel a sharp pain in the back of the thigh or knee, stop. This exercise is intense and should only be done after you have completed steps 1 and 2 for at least a week.
How Long Does It Take to Stretch Out Really Tight Hamstrings?
How long does it take to stretch out really tight hamstrings? The honest answer depends on the root cause. If your tightness is purely from sitting, you can see significant improvement in 2-4 weeks of consistent daily release and lengthening. If there is underlying nerve tension or disc issues, it may take 8-12 weeks or longer, and you should work with a physical therapist.
Do not expect a permanent fix in one session. The fastest results come from combining the three-step protocol with lifestyle changes: stand up every 30 minutes, strengthen your glutes, and sleep with a pillow under your knees if you sleep on your back. For a structured morning routine that includes gentle hamstring care, try our simple morning stretch plan to wake up.
I have seen clients who could not touch their knees make full toe touches in 6 weeks by following this protocol. But I have also seen people who needed 3 months of nerve glides before they could even attempt a hamstring stretch. The timeline is individual. The key is to listen to your body's stop signals, not to a calendar.
When NOT to Stretch (Contraindications You Must Know)
This section is the most important safety information in this article. There are specific situations where stretching your hamstrings is contraindicated, meaning it could cause harm.
- Acute hamstring strain -- If you felt a pop or sudden sharp pain during activity, do not stretch for at least 48-72 hours. Apply ice, compression, and gentle movement only. Stretching a fresh strain can turn a grade 1 tear into a grade 2.
- Lumbar disc herniation or sciatica -- If you have a confirmed disc issue (especially L4-L5 or L5-S1), stretching the hamstrings with a straight leg can increase intradiscal pressure and worsen symptoms. Use nerve glides and hip flexor stretches instead.
- Post-surgical recovery -- After hamstring repair, ACL reconstruction, or any lower back surgery, follow your surgeon's protocol. Do not stretch without clearance.
- Pregnancy-related pelvic instability -- During pregnancy, the hormone relaxin loosens ligaments. Stretching hamstrings too aggressively can lead to pubic symphysis dysfunction or sacroiliac joint pain. Work with a prenatal specialist.
If you are unsure whether stretching is safe for you, err on the side of caution. A consultation with a physical therapist or a sports medicine doctor can rule out underlying issues. For a quick way to track your activity and ensure you are not overdoing it, you can use our stretch steps equivalent calculator to see how your stretching compares to walking.
Common Mistakes I See Even in Experienced Movers
Let me share a few scenarios from my own practice where people got it wrong:
Mistake 1: The "fast toe touch" challenge -- A client came to me after trying a 30-day toe touch challenge online. She forced her way into forward folds every day, and by day 12 she had a hamstring strain at the ischial tuberosity (sit-bone). She could not sit comfortably for a month. The toe touch is a goal, not a daily stretch.
Mistake 2: Overstretching before exercise -- Static stretching before a workout temporarily reduces muscle strength and power. If you stretch your hamstrings for 60 seconds before a run, you are more likely to strain them. Instead, do dynamic warm-ups like leg swings and walking lunges.
Mistake 3: Ignoring the hips -- Tight hamstrings are often a symptom of tight hip flexors. If your hip flexors are shortened from sitting, they tilt your pelvis forward, putting the hamstrings in a lengthened and weak position. Stretching hamstrings without addressing hip flexors is like putting a band-aid on a broken bone. Include hip flexor stretches (kneeling lunge) in your routine.
Your 10-Minute Daily Hamstring Routine (Safety-First)
Here is a simple, daily routine that combines all three steps. Perform it after a warm-up (a 5-minute walk or gentle cycling) or at the end of the day. Use the stop signals listed above.
- Foam roll each hamstring -- 60 seconds per leg (step 1).
- Supine strap hamstring stretch -- 30 seconds per leg, 2 reps (step 2). Breathe deeply.
- Nerve glide (if needed) -- 10 slow ankle pumps per leg (step 2 alternative).
- Glute bridge -- 10 reps, holding for 5 seconds at the top. This strengthens the glutes and takes load off the hamstrings (step 3).
- Standing hamstring curl -- 10 reps per leg, using a light resistance band if available. This strengthens the hamstrings in a safe range.
That is it. Ten minutes, every day. Consistency beats intensity every time. If you miss a day, do not double up the next day -- just restart.
If you want to track how many calories you burn during this routine, check out our stretch calories per 25 minutes calculator for a rough estimate. But remember, the goal is not calorie burn -- it is safe, sustainable movement.
Final Thoughts: The Goal Is Not a Toe Touch
I want to leave you with a mindset shift. The goal of stretching tight hamstrings safely is not to touch your toes or to be able to fold in half. The goal is to move through your day without pain, to sit and stand with ease, and to prevent injury. If you can do that, you have already won.
Most people equate flexibility with health, but stability and strength are equally important. A hamstring that is both long and strong is far more resilient than one that is long and weak. Use the three-step protocol, respect the stop signals, and be patient with your body. The timeline is not a race.
If you found this approach helpful, share it with a friend who is struggling with the same issue. And if you are ready to build a consistent, safe stretching habit, revisit our guide on how to build easy morning stretch habits for the next step.